Voice Input
Voice Input brings OpenAI GPT-4o Transcribe or GPT-4o Mini Transcribe voice input to Obsidian Desktop, with optional dictionary correction and AI post-processing.
For voice input in any macOS or Windows app, try Blitzmemo.
Installation
Install the plugin in either of these ways:
- From Obsidian: Open Settings → Community plugins → Browse, search for
Voice Input, then install and enable it. - From the Community site: Open the Voice Input Community Plugin page and select
Add to Obsidian. Obsidian opens so you can install the plugin.
Settings
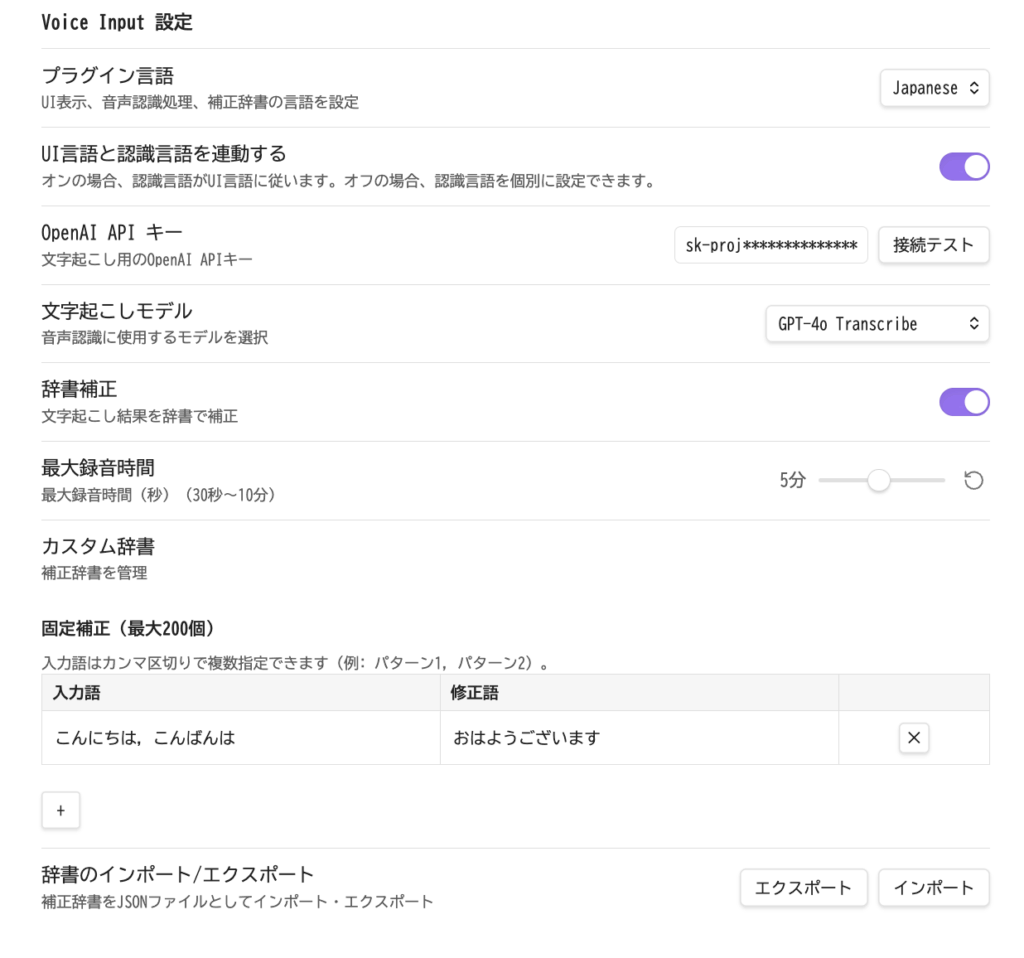
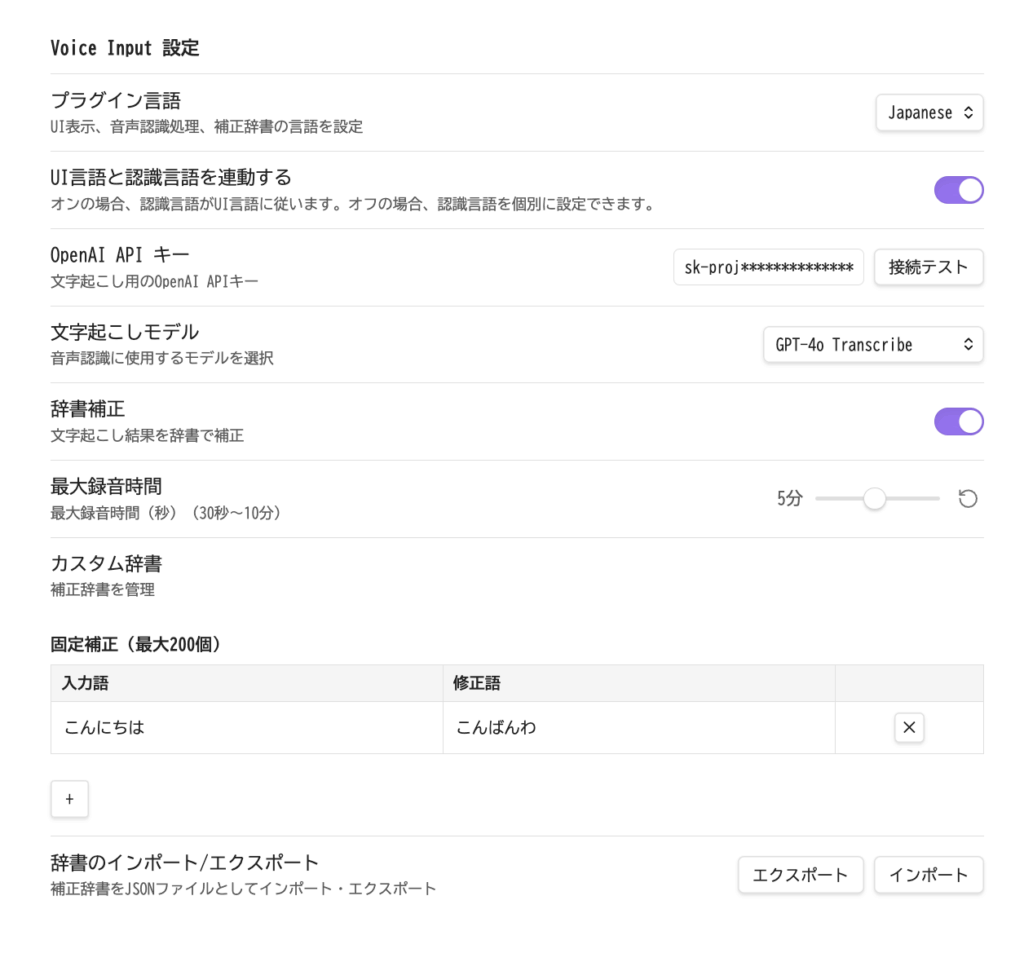
Enter your OpenAI API key, then select Test Connection. A successful test means the plugin is ready to use.
In-progress text is saved periodically and on blur as a device-local draft, then restored when the view is reopened. Drafts are not synchronized by Obsidian Sync or other services.
VAD is Off by default. Optional modes use server VAD or local VAD with a manually installed fvad.wasm file.
The plugin is desktop-only for Obsidian on Windows or macOS. Recorded audio is sent to OpenAI over HTTPS for transcription, and OpenAI API usage may be billed. Audio is processed in memory rather than written to disk by the plugin. The plugin sends no telemetry, ads, or self-update requests.
When Electron SafeStorage is available, the API key is encrypted with SafeStorage before saving. If SafeStorage is unavailable, a lightweight XOR/Base64 obfuscation fallback is used for backward compatibility; it is not equivalent to OS-backed encryption.
How to Use
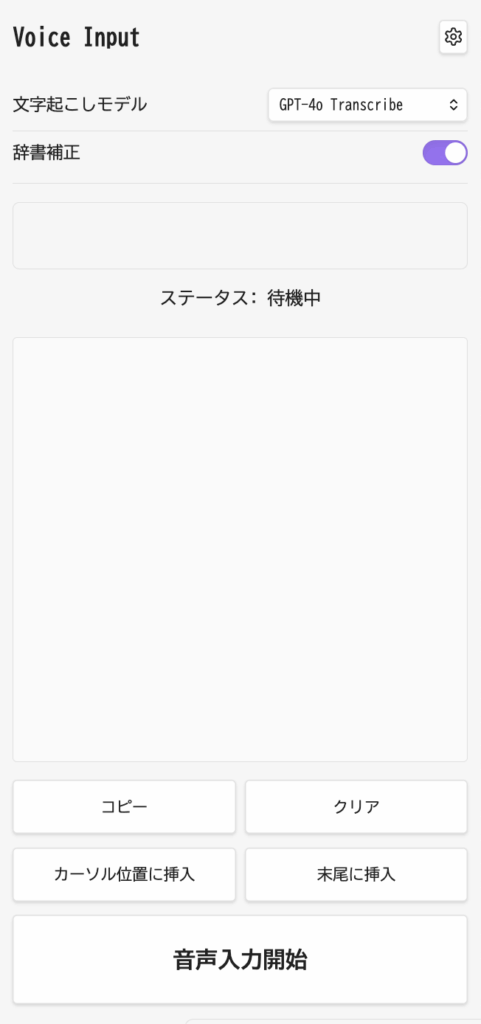
Open the command palette and select Voice Input's Open View command. The Voice Input panel appears on the right.
- One-click recording and push-to-talk while the button is held
- Copy, clear, insert at the caret, or append the result to the end of the note
Voice Input Modes
Select the start button once for continuous recording; recording continues until you select it again. For push-to-talk recording, press and hold the start button and release it when finished.
Continuous mode works well for longer passages, while push-to-talk is convenient for short comments.
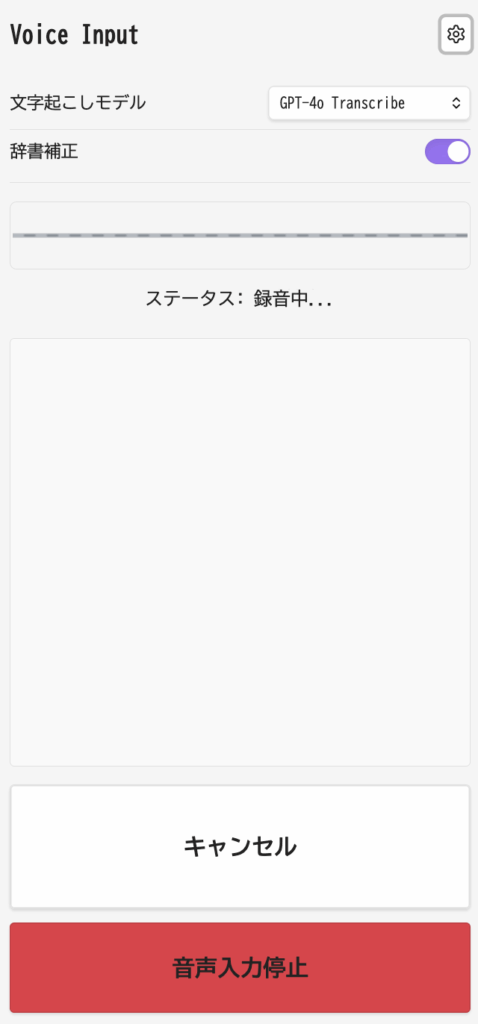
When recording is complete, select the red stop button to begin transcription. To stop without transcribing, select Cancel; the recording is discarded without incurring an API charge.
You can start another recording while previous audio is still being transcribed.
Replacement Dictionary
Enable dictionary correction, then add entries to the custom dictionary. Replacements are applied mechanically after transcription, making this useful for names or technical terms that are repeatedly misrecognized.